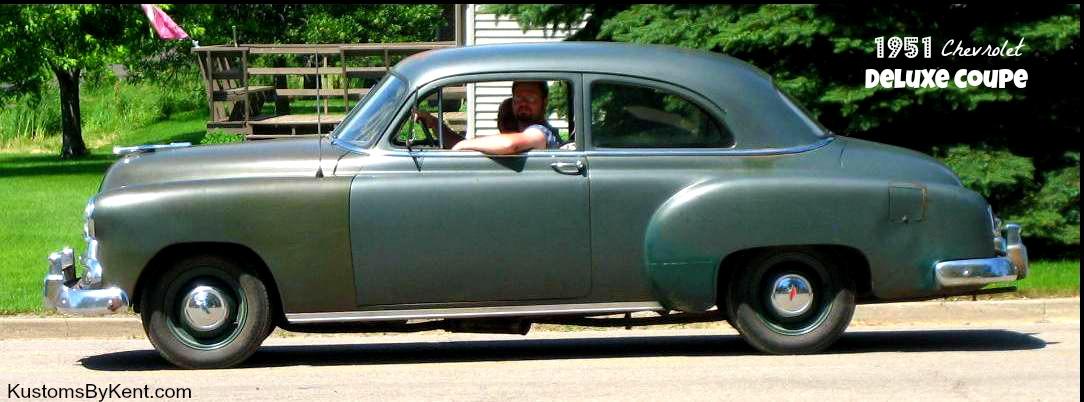
1951 Chevrolet Coupe
Purchase
My brother and I bought this car at a nearby auction back in 2000. This old guy had collected cars for many, many years, and was selling off many of them to make room. We went out a few days before the auction to preview the cars. We were extremely interested in the ’51 Chevy, and he started it up for us while we were there. He also showed us a ’51 Kaiser that was pretty cool, the starter was activated when you floored the gas pedal, but we knew that was going to be out of our price range.
The day of the auction arrived, and when it got to the ’51 Chevy, and the auction people tried to start it and the weak 6-volt battery wasn’t up to the task, and it wouldn’t start. That tends to put a damper on the bidding, which worked to our advantage. We finally made the winning bid at $1325. We watched some of the other cars get sold, the 30’s Fords went for ridiculous prices for bare steel shell.
Once we paid, and decided to leave, the battery was still weak, but fortunately it was parked on a slight incline, so we gave it a good push, popped it into 2nd gear and it fired right up. We drove it into the nearest town to fill up the gas tank for the ride home, another 20 miles away. We had to shut it off to fill, and so of course it wasn’t going to start from the battery, which was basically junk. Fortunately the gas station had a nice flat smooth lot, so we pushed it out into the open, and then lined the 2nd car up behind it (1988 Chevy Nova, which is the same platform as a Toyota Corolla), the bumpers matched up perfectly, and gave it another push start! Then we were off and rolling toward home.
For some time we just used the Nova to push start it whenever we wanted to take it for a spin, and then we finally broke down and bought a new 6-volt battery.
We soon discovered that the block had a crack in it on the outside of the water jacket, and continuously leaked water out. Pouring pepper in the radiator is a decent short term “fix” as it helps to plug up the crack. For a number of years we just left it, as the motor ran great, and leaking some water out wasn’t a big deal.
Car Show
Fast forward many years, and the addition of several other vehicles, I thought it would be fun to take it to the local car show on the back of the flatbed ’51 International truck along with my girlfriend turned fiancé. Due to limited time, and the ’51 Chevy had been sitting for a few years, and it didn’t want to fire up right away, so I used the snow dozer to pull it out of the storage position and get it lined up to the trailer that served as a ramp up to the flatbed. Then I hand winched it up the trailer and onto flatbed.


Here it is at the car show:

Wedding Car
Since my new fiancé also likes old cars, we decided it would be cool to have an old car as our wedding car. The ’51 Chevy seemed like the best choice, so now I had a deadline to get it up and drivable again. I started doing work on it in June, and our wedding was in October. There were a number of things that needed to be fixed: cracked block, tighten up the steering, and the starter.
The Repairs:
I started working on the cracked block first. My first attempts were to use JB Weld to seal up the crack. Since the crack was so long lengthwise, I just couldn’t get the JB Weld to seal in there properly, and it just wouldn’t hold. Since the motor needed to come out anyway to fix the steering arm, I decided to try to weld it. First task, disconnect all the wires, and prepare to lift it out. The forklift came in real handy!


After getting the motor and transmission out, I noticed that the u-joint yoke between transmission and driveshaft was a bit looser than desired. Since it’s a pain to get out, I made sure to get the parts to rebuild that. Once I got the parts from NAPA, I would be ready when the motor went back in. While the motor was out, my fiancé was super helpful, and got to work with a scraper on the transmission to clean all the gunk off of it!


Since the motor was out, it was now easy to check out the steering system, and sure enough, it was the bushings on the idler steering arm that were sloppy. I ordered a bushing kit from Chev’s of the 40’s.
When rebuilding these kits, you have to press in the bushings, and then ream them to size. Hmm, more tools necessary, so I ordered a full adjustable reamer kit from Enco that I could use in the mill. While waiting for the parts to show up, I worked on the cracked block.


I did a lot of research on welding cast iron, and there is a lot of mis-information, and also a lot of false information. Many techniques, but most of them seemed to recommend doing some sort of preheat. Not exactly easy on a large cast iron block that’s still fully assembled. Others recommended to keep the welds small and everything cold, which seemed a better plan in my case. My first order of business was to grind out all of the JB Weld, and try V it out so the weld had somewhere to go. After prep’ing it the best I could, I started some short small welds. That progressed to some larger welds, and then there were some small cracks in the welds, so more welding, and on and on. This is not my proudest work, but I finally got enough heat built up, and enough weld on it so seal it all up. There were still a few tiny cracks, but everything seemed structurally together. I then made a nice skim coat of JB Weld onto the entire area to really seal it up good. A little bit of radiator sealer in the system could finish any tiny leaks from there.


Additionally, there was some small copper tubing that ran through the block and then up to the head for oil circulation. The tubing and fitting wasn’t very good, and I had to remove it in order to get access to the crack fix. I spent a lot of time and effort finding all of the correct compression and NPT fittings to rethread this copper tubing through the block and up to the head. The final result was nice, and worth the time.


Now the steering bushing kit and reamers had shown up, so now it was time to get that done. That went fairly good, and the final assembly turned out nice.
Now I could get the motor slipped back into the car, connect up the new U-joint bearings, and get on with getting the car running.
Meanwhile, time was quickly going, as there were numerous other projects unrelated to the car, as well as a bunch of stuff related to the wedding.
Finally it was time to fire up the engine in the car, and it was only 2 weeks before the wedding. Initial fire up went ok, but after running for a few mins it started making some weird noises and quit. It was coming from the valves, and lo and behold I discovered that some valves had stuck open! The smell of varnished gas was pretty stinky, and I was suspecting that the varnish gummed up the valves and made them stick. The only way to know for sure was to pull the head. So off it came, and sure enough, the intake valves were completely gummed up!!! Fortunately, I had stopped it in time, and nothing was actually damaged or bent. After a few hours of cleaning all the gunk and gum out of the valves and intake passages, I was ready to put it back on. I also didn’t have a new head gasket, but no time to get another one either, so on it went. Then I drained all the old varnished gas out of the tank, and poured in fresh gas.


So lesson learned, don’t even try to use old gas, just drain it and start with fresh!
Now finally the engine was running good, but the starter was still a bit weak. I know my limits, and starters are best left to the professionals, as they have the tools to check the windings. I took it to Nielsen’s in Brookings, SD for them to have a look. After a diagnostic look, they determined that the windings in the armature had some shorts, and that’s why the starter was weak. It wasn’t cheap to get replacement parts, but $220 later, I had a good working starter. I popped it back in the car, and worked like a champ!
Then I did some basic cleanup work like giving the wheels a quick paint job, and then my mom had gotten “new” chrome centers for the wheels! After that, the car was a ready as it was gonna get for the wedding!
The big day came, and the car performed like a champ! We drove all around the big city of Sioux Falls, SD and no problems whatsoever.

Want more pics of the car in the wedding, click here.
Gas tank
A year later we took the ’51 Chevy to another event, this time a parade, and this time driving it there instead of on the flatbed. The parade was about 30 miles away, and once we got there and were waiting for the lineup, it was having some fuel issues. I emptied the sediment bowl, that that made the difference. Then it needed a good push start to really spin it over and get the fuel flowing again. It ran fine through the parade, but then on the way home we took a gravel road, and we ran out of gas! Fortunately for support vehicles, so somebody ran home, got some gas cans and we filled it up. Then I noticed that gas was dribbling out of the bottom of the tank, so I knew we had to hurry up and get home. Once home, I lifted it up with the bumper jack, and the gas tank had some pin holes from rusting through. The brother-in-law was out visiting with the family, so he helped me, and we dropped the tank out, and I cleaned it up with a wire wheel. Then we “fixed” it with JB Weld as a temporary fix.

Note that the bumper jack is locked in that position, and there’s 2 jackstands also in position.
Knowing that it was only a temporary fix, as there were a lot of areas, and the entire bottom is ready to rust out, I ordered a brand new steel gas tank from Chev’s of the 40’s. Unfortunately I haven’t had time to put it in yet, but it’s all ready for when I do.
