Wood Gear Clock Project

I have always liked clocks, and I think I get that from my mother! Let’s just say that in her living room that you never have to worry about seeing a clock to tell what time it is.
For me, I like the mechanical movement of a clock with the gears moving, timed by a moving pendulum escapement wheel or some other mechanical movement. Digital has no place here!!!
Many years ago, there was a tool auction advertised locally, and my brother and I went to preview the tools before the auction. It was an old gentleman that was going to the nursing home, and so was liquidating his tools. He was interesting to talk to, and showed us many of the projects he had built over time. One of which was a wooden gear clock. Here’s some pics of it:

From that point on, I knew I wanted to build a wood gear clock at some point. I wasn’t set on any particular wooden gear clock, but I knew the first one needed to be a more simple design than this one.
Many years went by, and I didn’t think much more about it until I was in the process of moving to China in 2011, and in preparation I saw a wooden gear clock featured on the cover of Scroll Saw magazine. It is the Spring 2011, issue 42, and there’s plans for the Genesis Clock by Clayton Boyer.

I’ve got the Dremel scroll saw, and with a transformer to convert China power (220v) to US power (110v), I was all set to work on this. Having just moved to China, I needed some hobby projects to work on, and this was perfect.
Since basically everything in China is metric, including the thicknesses of plywood, I needed to do a bit of figuring and looking to find sheets that were similar sizes since much of this clock is based on stacking various thicknesses to achieve correct elements. This was one challenge of this project. It also had several different diameters of pins that were needed, and those also needed to be metric sizes. After finally getting plywood that was close enough, I was able start moving forward.

I copied the plans, and then glued them to the plywood, and then rough cut out large pieces with the jigsaw before moving to the scroll saw. I spent many hours scrolling away, cutting out each gear. I’m sure my neighbors just loved hearing the hum and vibration of my saw located in the 4th floor of our place!
I made fairly quick progress of cutting out all of the major parts for the clock, and was soon able to roughly assemble them together:

The plans call for attaching the clock to the wall, which seemed a bit too permanent for me. Also, I wanted to test the movement of the clock, and try to dial in the timing of it. So I first made a very rough frame that allowed it to free stand, and I could see how it would spin. I forgot to take pictures of this rough frame, probably because it was pretty ugly! But it can be seen in this video where I’m doing some spin testing with the gears:
It’s here that I discovered that my gears weren’t as perfectly round as they should be, which affected the movement of it. I had skipped an important step in the instructions where you are supposed to true up the gear blanks before cutting the teeth. I felt too invested to cut new ones, as I intended it to be more of a display piece rather than a true time keeper. Also, I wanted to put some finish on it, which the instructions indicated would also affect the function, so I wasn’t too bothered by this. I took some time to file each gear tooth where there was interference, which helped, but not enough to make it work in real time. Lesson learned, read the instructions better next time!
I liked the idea of a free standing frame so much, that I went ahead and designed my own frame that could be aesthetically pleasing and complement the clock gears without competing with them.
A few limitations though, I had to limit the longest piece to only 26″, as I planned to take this back to the US as a present for my mother…. remember, she likes clocks!!! So that meant I had to make something in the middle to splice the wood frame together, and still look good. I also wanted it to break down into pieces for easier packing into the suitcase.
I started with the top of the clock, and made some pieces that attach to the gear frame, and then fit over the tops of the ~1×2″ wood that made an A-frame:


I liked the way the top fit over the A-frame, now to figure out the rest of the frame.
I spent a lot of time thinking about it, drawing hand sketches until I finally had something I liked. I then did a 3D model of it to verify that the dimensions worked, and that it looked right. I also wanted to have no visible fasteners even though it would all come apart. I implemented a system of hidden pins for the base, and a different system for the middle. Here’s what the base looks like:
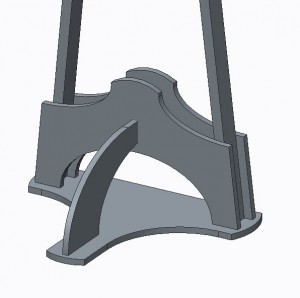


The pins have some curve to them, so when I rotate them 95 degrees, they apply pressure to keep everything locked together.
The middle is a sandwich of layers of plywood to clamp the ~1×2″ wood of the A-frame together to make a solid frame. Easier to show in pictures:


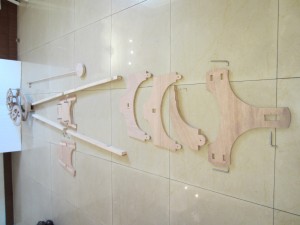
Here’s some pics showing all of the pieces for this clock:


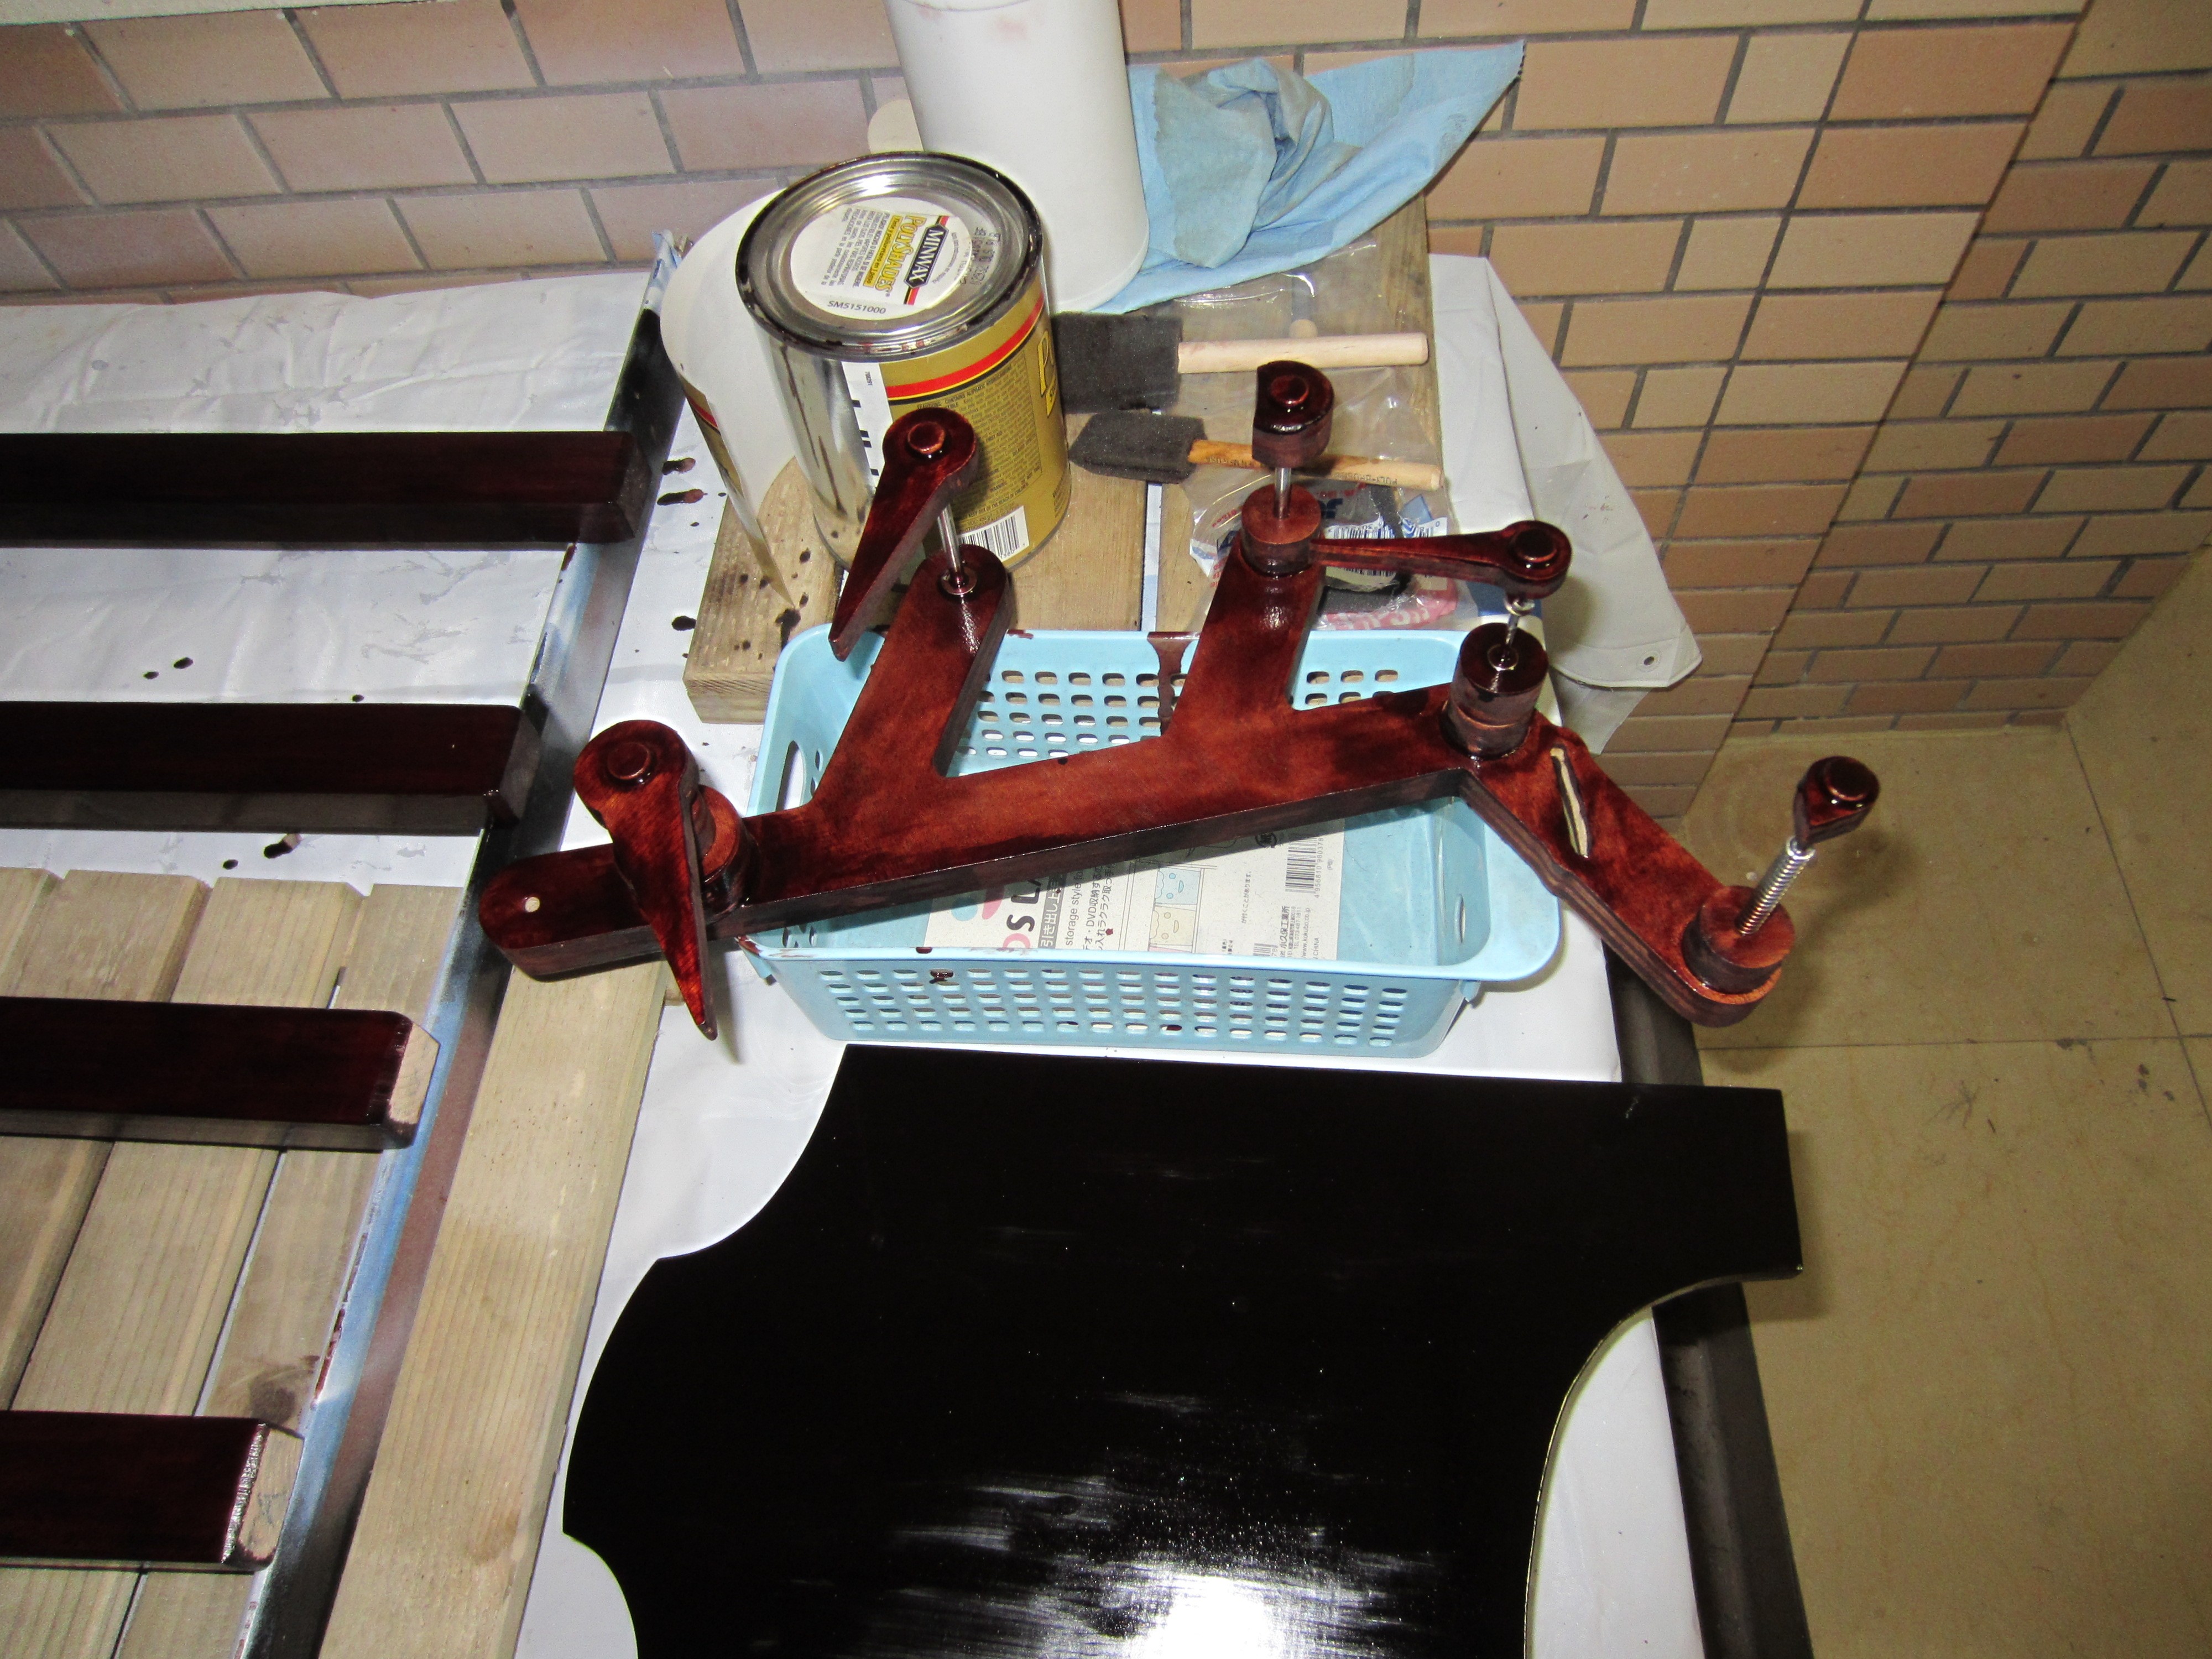
Now to start on the finish: some polyurethane with stain. I chose Bombay Mahogany as the color by Minwax. Unfortunately, I got the satin finish rather than the gloss.
Over the course of 1 year I applied the finish to the bits and pieces. As the finish sat in the can over time, and if I didn’t stir it, then the finish got glossier, which I was definitely happier about. I had some struggles with the finish going on smooth and not leaving brush marks, which I partly attribute to the days when it was really hot in China and I think the finish was drying before it had a chance to flow out properly.
So here’s some pics of applying the finish:


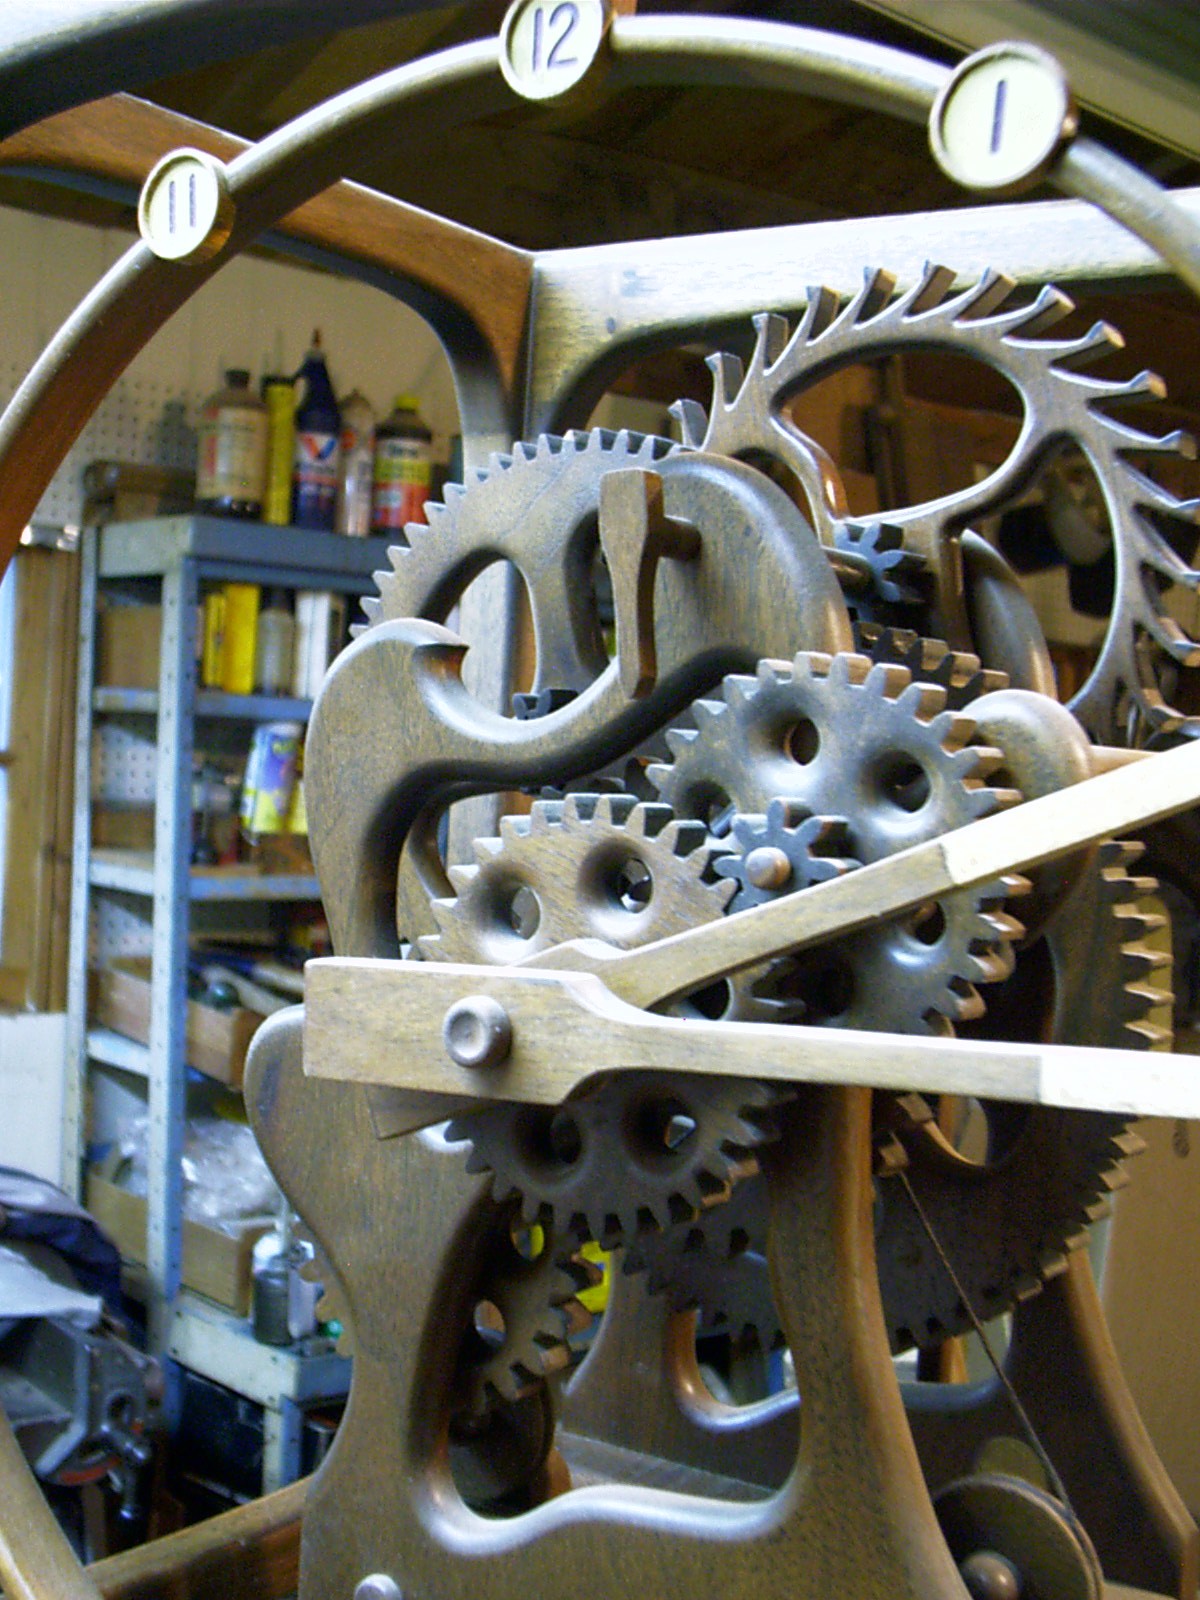
For some contrast to the dark wood of the frame, I decided to clearcoat the gears, making them a lighter finish that stands out more. I had wood burned in the numbers using my soldering iron pointed tip, and the clear finish really makes that standout.


Here’s the gears all assembled:


I still needed to make some nice looking weights. I found some stainless steel plates at the Chinese market, and then I filled them with mortar mix, and closed them up with a round piece of plywood also finished in the Bombay Mahogany.


Some stainless steel screws, some SS wire for some hooks, and then the final assembly.
Here’s the finished clock!


I want to make a video of the assembly of all of the pieces, so I’ll post that once I have it compiled.
Here’s some random Chinese clocks that we saw in Hong Kong on a trip:

