 transformed into this:
China Cargo Trike
Written Aug 28, 2014 to Present
When we first moved to China back in February, 2011, I noticed a lot of these China cargo trikes around the city moving everything from furniture, to construction material, trash, water bottles, and everything in between, and I wanted one! Not sure why they appealed to me, but I had to have one.
The are a conventional trike in the sense that there’s a single front wheel, and then 2 rear ones, but have a cargo area in back that varies in size. The ones I liked all start out as pedal power, and then they get upgraded with electric motors and batteries or gas engines from motorcycle/scooters. That’s the part that appealed to me!

I looked around a lot to find a place that sold these, but with no success. My wife likes research, and she finally found a blog post of another foreigner that had bought one, and he listed the address. So now for the weekend to go check it out!
April 5, 2011
We hopped into a taxi, gave the address to the driver, and off we went! We’d looked it up on google maps, so we had a decent idea of where to go, and knew it would be a bit of a cluster to find. Without too much hassle, the taxi driver made it to the main street, and then drove slow until I spotted the trikes parked on the side of the road:

It was very near an elevated highway, which helped to provide shelter for the trikes. There were several models to choose from: short wheelbase with bicycle style wheels, long wheel base with heavy duty bike wheels, and then the beast: long wheelbase, welded steel spokes on the rear wheels and a heavy duty bike wheel for the front.
Yup, that’s the one I chose, as I wanted more room to mount the gas engine, and might as well get the tank version! I probably should have gotten the smaller one for fitting in the garage, and to skip the welded wheels, but oh well!
The shop where these things were fabricated and modified was typical of every scooter shop in China, a MESS! Tools scattered everywhere, no organization, and old parts mixed in with new ones.
This picture doesn’t do it justice!

I test rode it, and decided on buying the beast. I also wanted the official fapiao, which is a receipt stamped with a red star to be official. This cost me slightly extra, as now the transaction was officially recorded and they would have to pay the sales tax on it. Total cost of the trike was 1200 rmb, about $185….. next question… how to get it home? Ah no problem, a family friend/relative/etc of the shop had a truck that could take us back to our place. The cost was “only” 200rmb, which seemed to be a fairly typical delivery cost. China also has delivery truck taxi’s, but we didn’t know this at the time, but those are hard to find and usually need to be called.
The loading procedure was strictly manpower, no ramps, liftgate or other device to help:


Unloading was the same once we got to our place, but less manpower! Here it is in my tiny little China garage:
My tools from the US in our ocean shipment had not arrived yet, and so no way to do any work on it yet!
I rode it around our complex some to test it, and there were a few things I noticed right away…. This thing sucked to pedal!!! The gearing was none existent, so it was tough to get it started from a dead stop, and then wasn’t enough to go faster once it was moving. So first on the list was to somehow add a bicycle gearset. The next thing was that something was up with the steering, so that when you steered left it wanted to throw you to the right and steering right would throw you to the left! Not exactly appealing if I wanted it to go any faster! More on this later!
So, first on the list: find a cheap bicycle to get the gearset off of, and start looking for a gas scooter for the motor.
Both of those items were fairly easy to find, I got a super cheap 10 speed bike from Carrefour (similar to walmart, but french owned) for 279 rmb ($43) and rode that home on April 13, 2011. It was a real POS riding home, the steering was terrible, the seat sucked, and it flexed fairly easily. But the gears shifted, and that’s all I cared about!
I surfed through craigslist in Shanghai, and found a used gas scooter that had been used and abused, which was more desirable since I was going to cut it up. The price was fairly cheap too at only 700rmb ($108). It was located near city center, so quite a ways from us. We headed over there in a taxi, and met the guy out on the street corner. He drove the scooter out, and it had definitely been used and abused! The body work was fairly beat up, but it ran ok when I took it for a test spin. It didn’t have a license plate, only a fake one for getting gas. Sidenote: for electric scooters in Shanghai, the laws at the time didn’t require licenses, but all gas ones need a license plate. Only some have a valid one, and fake license plates are for sale at the scooter market. You do run the risk of it being confiscated which is partly why this guys was selling it. Also, he wasn’t the least bit handy, and this scooter needed some work!
We sealed the deal, now to get it home. Too far to drive it, but he had a chinese girlfriend, and she arranged a friend of her’s with a van to deliver it and us back home….. again, it was 200rmb.


I had brought some small hand tools with in our luggage, like a 6-in-1 screwdriver, vicegrips, and pliers. That was enough to get started on some disassembly work! The scooter had an alarm system that was really badly installed, so first order of business was to remove that wiring hack job.
I also disassembled the bicycle to get the gearset out to see how that might install on the trike.


May 2, 2011
Some of the guys at work have a side car motorcycle, I didn’t have one….yet.… but they wanted to go to the scooter market for some random parts, plus it’s just fun to look at variety!
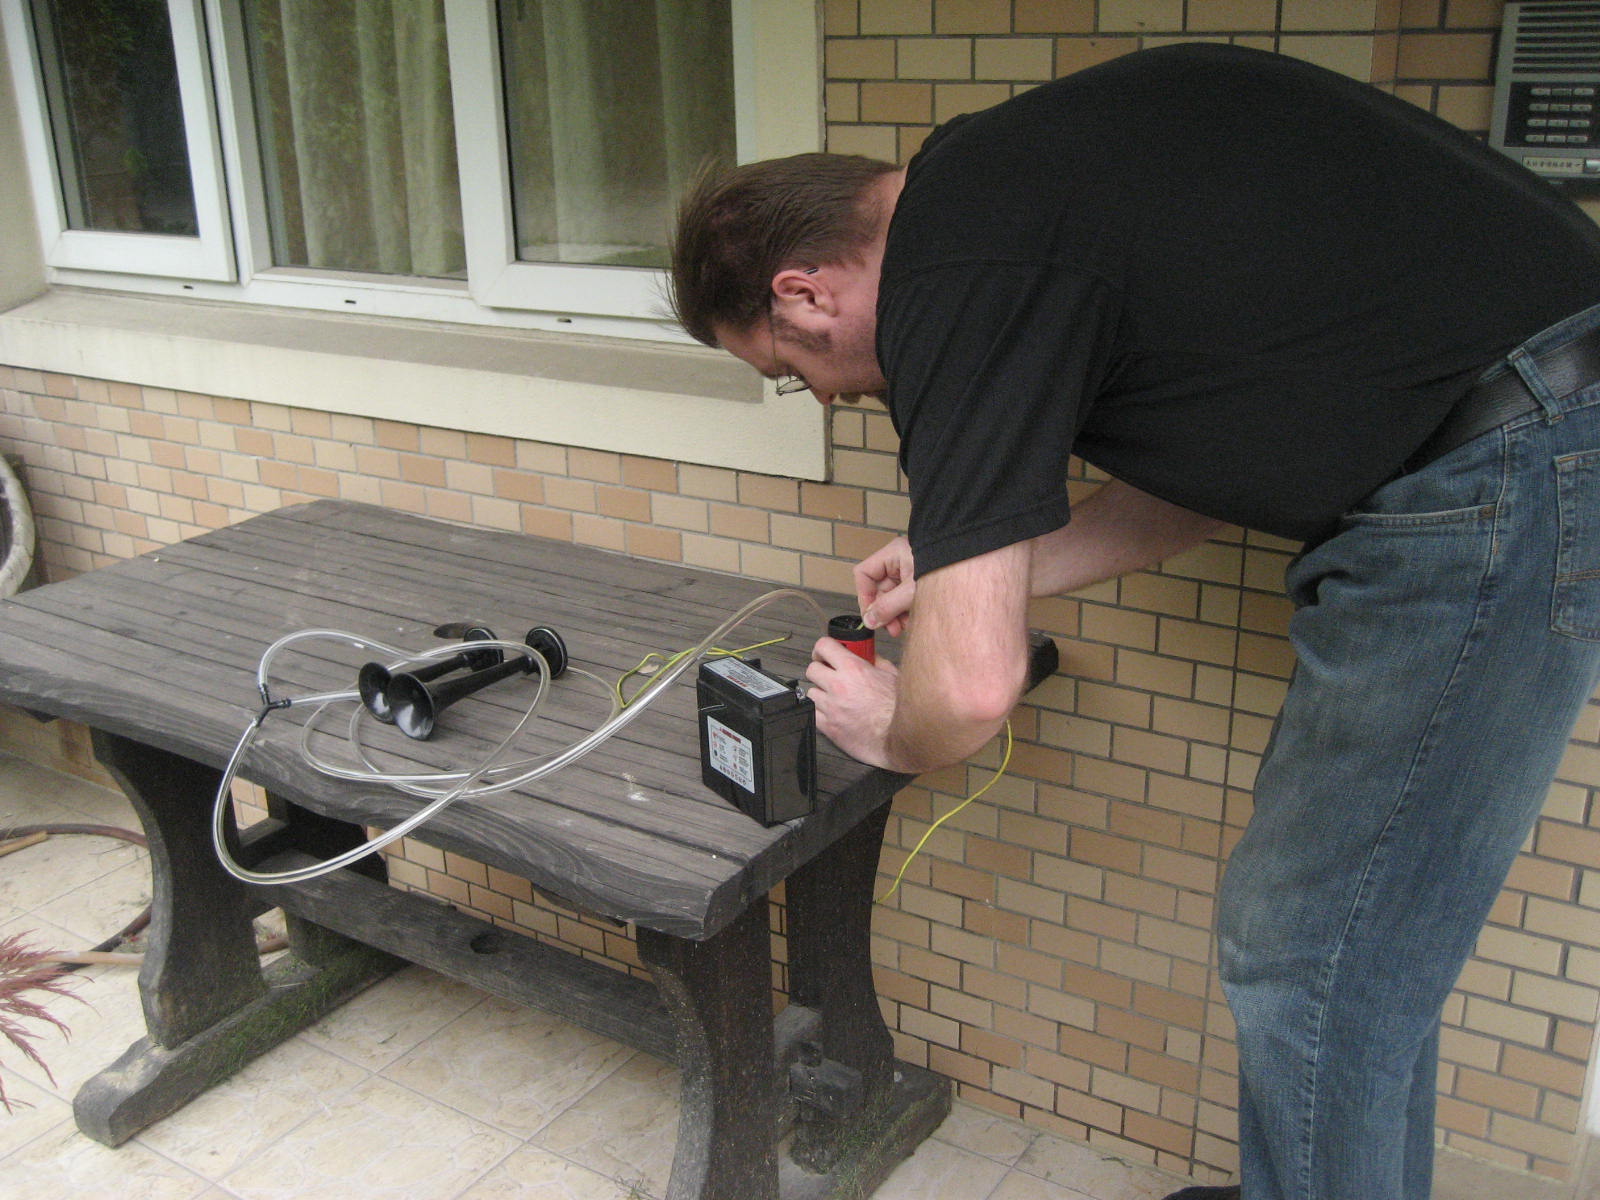
I ended up making some purchases: LED turn signals, a gas can, gas siphon, and best of all, an air horn kit!!!
I had to try this, so I borrowed the scooter battery, cut up some wires, and got it enough to try. Yup, it was LOUD!!!


May 13, 2011
Our ocean shipment container arrived with all of our stuff, and most importantly, my shop tools! I packed hand tools, some power tools, cordless drills, jack and jack stands, and best of all: my little 110vac wire welder! I also had bought a very large transformer to convert the China power of 240VAC 50 Hz to 110 VAC 60 Hz. That transformer is 5000 watts, more than enough to run the welder continuously. The welder needs 20amps at 110vac, which is 2200 watts, and to run continuously you’re supposed to have around double the max usage. There was also a lot of household stuff in our shipment, including our soft American mattress, good sleep finally! Chinese mattresses are a lie, they should be called plywood they’re so hard!
The trike didn’t come with a plywood bed, just the steel frame, so I needed to buy some wood for it. I also was going to need some steel in order to mount the motor into the frame.
There was a nearby shop that carried some selection of steel, and the shop next door carried plywood. I arranged for the plywood to be delivered in the van, and the steel pieces were delivered using the shop’s scooter.


June 10, 2011
Over the course of the month, I worked on getting the pedal bike gear sets installed into the trike off of the donor bike. I cut off the ends of the frame from the bike that held the rear gearset, and used that as mounts to weld it into the frame of the trike. I removed all of the spokes from the wheel, and then took apart the gearset to rearrange the gears, as this had to also act as a driving sprocket back to the trike axle. So I made it be 3 gears for ratios, then a spacer gear, and then the gear to drive the chain for the rear axle. I also reconfigured the front crank to have multiple gears and a shifter. The front and rear shifter handles got mounted up on the handlebars so that I could then do some testing with it.
Here’s some pics of this part of it:


Now that I could pedal it easier, I could better evaluate the steering, and I could tell the geometry was way off! I started to do some research on fork design, steering geometry on a motorcycle vs a trike, and realized there’s a lot of mis-information, and a lot of good information out there. It also highlights to me the lack of knowledge on the part of the Chinese. They copy something and have no idea about the physical properties and calculations behind a design, and when things get copied, not everything gets copied correctly. This trike is a good example of that. As I learned and measured and compared, I realized that the rake and trail was completely wrong!!!!
Some background on rake and trail:
Trail is the amount that the steering axis of the wheel is in front of the wheel. This allows the point of the wheel that contacts the ground to “trail” the steering axis. Picture the front wheels on a shopping cart, they are casters, and the steering axis is straight up and down, and quite far in front of the wheel, which allows it to trail along as the cart is pushed along.

On a car, the wheel is being held by the steering rack, and so we don’t need as much trail. So the vertical steering axis is theoretically just a small amount in front of the wheel contact point. Now this is not the same on all cars: passenger cars have more trail, so they steer straight easier and thus are easier to drive. Sports cars have much less trail, almost to the point of having zero, and so they tend to be twitchy when going straight, but also corner way better.
Caster is the amount that the vertical steering axis is reclined back from vertical. On motorcycles this may range from 10 degrees on sport bikes to 45 degrees or more on custom choppers. Rake is the inclination of the forks, and if the triple trees are parallel ones, then rake is equal to caster. Generally the more rake or caster there is, the more trail there is, and the vehicle will generally go straight better, sacrificing turning ability. Next time to see a custom chopper with a long rake, notice how difficult it is for them to turn at low speed. Now, properly designed, you can achieve almost any rake, and trail combination that you would like to achieve the handling characteristics that you want. This either requires experienced knowledge, and/or a good understanding of the design behind this. Screw it up like it is/was on my trike, and the handling will want to throw you off!!
Now, there’s many more aspects of this that I’m not going to get into, as there are others that know alot more about this subject than I do, and there’s many books written on this subject, but I want to mention two other factors that are also important, particularly for cars: Caster and Camber. They don’t apply to the trike, but are worth mentioning for people researching this subject.
Caster: almost the same as rake, but caster is the more commonly used term for car suspension geometry. Rake is generally used to describe motorcycle geometry, specifically the angle of the forks. On motorcycles, caster is the angle between the head tube and the ground. Modified triple trees so they aren’t parallel makes it so rake is not equal to caster, and also affects the trail.
Camber: This is the amount that the tires tip in or out to the centerline of the car. Wheels with the top of the tire tipped in towards the top generally adds in handling of the car for cornering.
Caster, Camber, and Trail have some complicated relationships for car suspension, and while I have a working knowledge of them, here is not the time nor the place to discuss them in detail.
7-25-2011
Back to the trike…. it had negative trail, meaning that the contact patch of the tire was IN FRONT of the theoretical point on the ground from the steering axis.
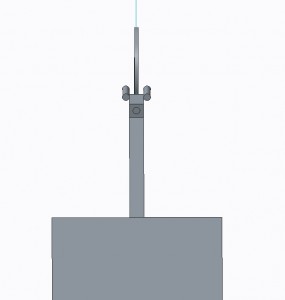
To determine this, I used a straightedge ruler to extend the axis of the pivot point of the triple trees down to the ground.

I also made a 3D CAD model to further test what was going on, and also to try the solution. Details that weren’t important to the test were not modeled, so the model isn’t very pretty!

After making changes in the model to fix it, the frame now moves to the same side as you are steering to… ie… When you steer to the left, the frame moves to the left, and same for the right. You can just barely see this in the top view of the CAD model:

So now you’re probably wondering what changes I made to get this to work, well, it was a combination of factors: I added the front wheel and forks from the scooter, I sliced the frame and tipped the whole front end back to get more steering inclination, and then modified the triple trees to be non-parallel.


Before I did the cutting on the frame, I made a simple 2D CAD model to know how much to cut and where:

So, how did it all turn out? Well, this picture illustrates the change in the trail, similar to how we checked it before I did the modifications:

Whew, so finally it steers the way it should instead of trying to throw me off! It felt good to implement the correct geometry to eliminate the screwed up designing (or lack thereof!) of the Chinese!
Meanwhile, I had also been working on tearing down the scooter for the engine and other miscellaneous parts:


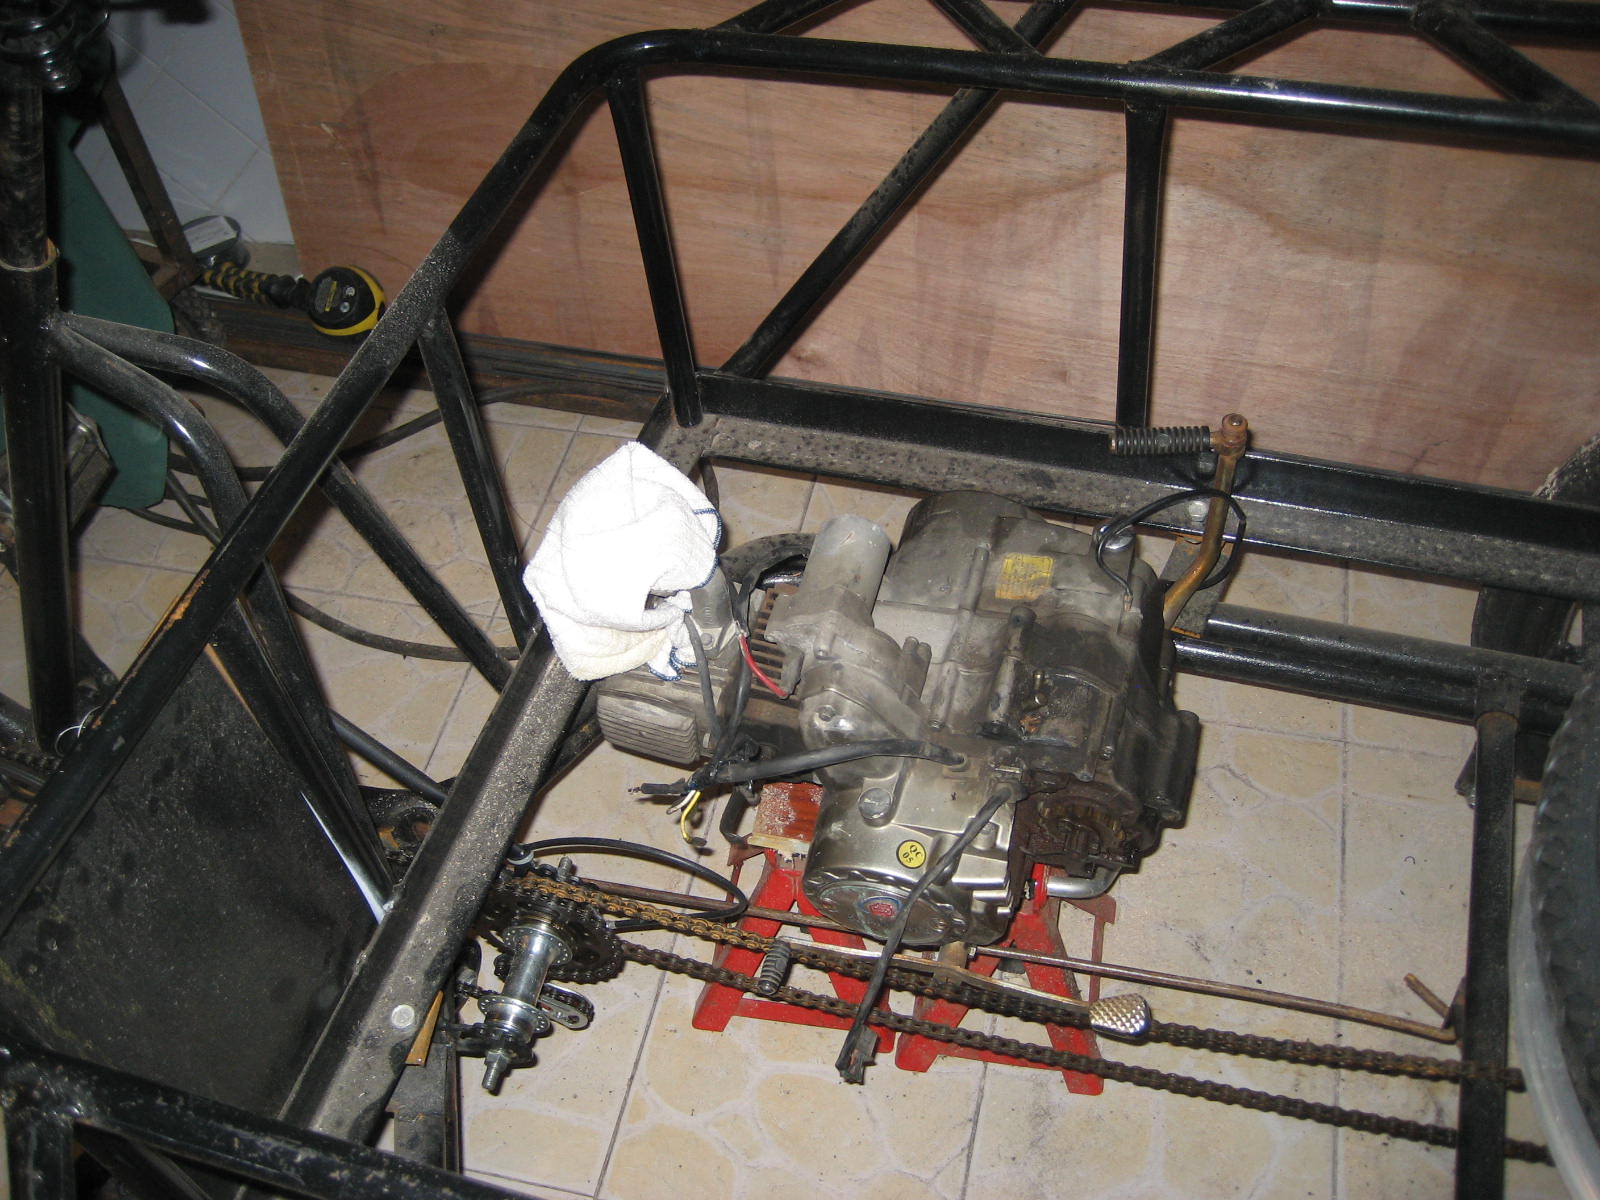

I started by getting the scooter engine out, and setting it temporarily in the trike with jack stands to hold it up. The engine is 110cc with a 4 speed clutchless transmission.
Now to start to make the supports for the engine:


When I started tack welding the mounting tabs to the square tubing, I could really tell it was some thin crappy steel… this would come back to bite me too! Stay tuned to find out!
8-15-2011
I also mocked up replacing the trike seat with the seat pan, seat and hidden gas tank from the scooter:


9-15-2011
As I started to do welding and grinding in the garage, I could see the grinding sparks leaving marks on the tile floor of the garage. Since this is a rental I’m in, I figured I better do something to protect the floor so that I don’t get dinged on that later! Never to go halfway, I ended up buying the cheapest laminate flooring I could find locally in China, (which was pretty cheap!!) laid down a layer of thin foam, and then laid down the flooring. You can get an idea of how small this garage is that I have, but it sure beats leaving in an apartment and not having a garage! I miss the big shop in South Dakota!!!!


It’s big enough (small enough?) for a SMALL compact car…. not like the typical garages in the US!
10-17-2011
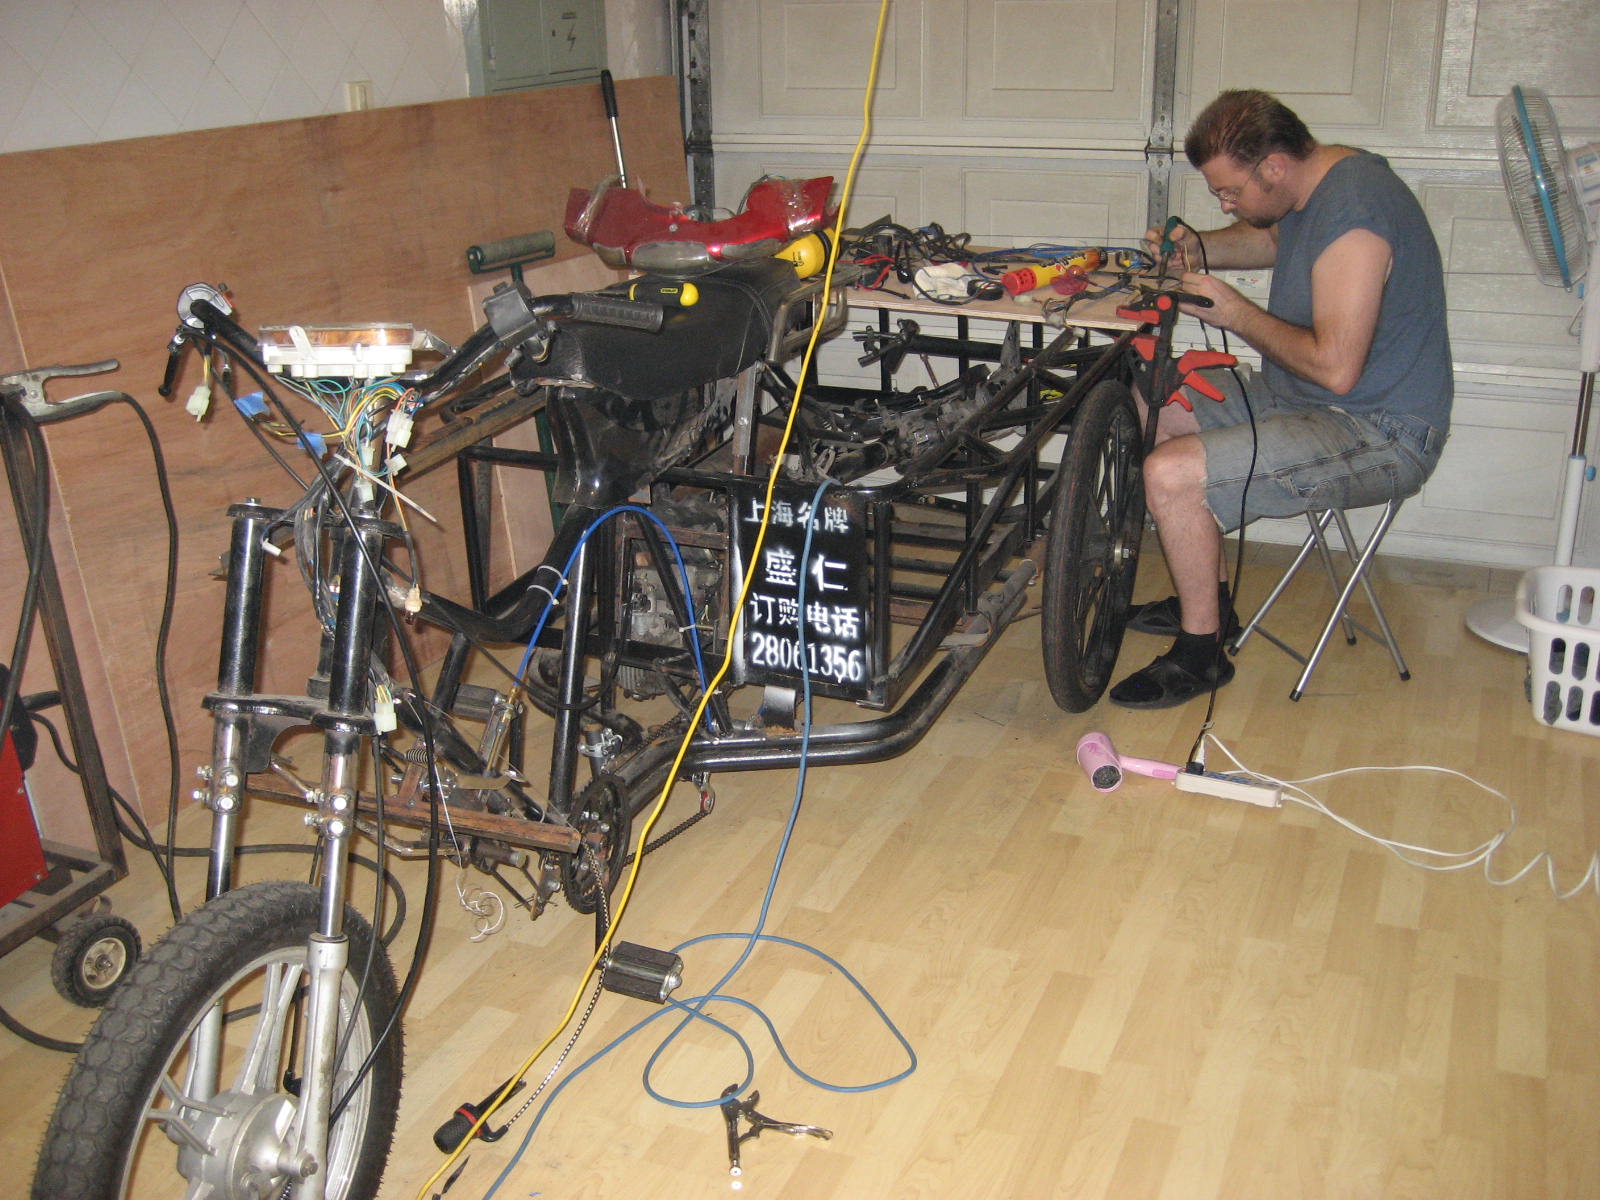
I continued to make some decent progress, getting the engine mounted, the seat pan assembly mounted, and the adding some foot pegs with controls for shifter and brakes. I realized that in order to make the shifter work how I wanted, I needed a decent push/pull cable assembly. Rather than mess around finding stuff in China, which can be a time-consuming wild goose chase, I ordered a transmission shifter cable from Summitt Racing, and the mother-in-law and my wife’s aunt muled it over since they were coming to visit us! Good thing for relatives and travel! See guys, occasionally mother-in-law’s do come in handy!!!! Just kidding Anita! And thanks for bringing that over!
So here’s some pics of the progress while they visited:


Since family was here, they wanted some glamour shots, so here we go!


The next step was to work on getting all of the wiring in. I wanted to use the scooter gauge cluster for a number of reasons: speedometer, gas gauge, gear indicator, turn signals, etc. The only problem was that the wires were too short, so I spent some time lengthening the entire harness by about 5 feet! There were ~8 wires to lengthen, which I soldered all of the connections and then put heat shrink over the spots. I really hate soldering, but I got it done! I also had to locate and mount all of the miscellaneous electrical items that make the engine run and charge the battery, not sure on exact names or functions! I also mounted the gauge cluster, lengthened the throttle cable and choke cable, and got the engine chain connected to the rear axle. I also mounted the battery down in the frame in a location that it can be secured so no one can steal it!
11-4-2011


Here’s some progress pics I took on 2-19-2012:


Between 11-4-2011 and 2-19-2012, I was in the US, then Japan, then the US again, then back to China, then vacation in Thailand and finally back to China for awhile.
Here’s a few better pics on 2-25-2012 of the progress:


By lifting up the one driven rear wheel, I was able to pedal start it, as the kick starter wasn’t accessible yet, and the electric start wasn’t working very good because of a weak battery.
I know I took some test drives with it around our housing complex to test the drivetrain, but no videos or pics of those occasions…. don’t worry, there’s videos coming up! I do remember loosing lots of miscellaneous bolts, nuts and washers around the complex during testing!
For some reason I don’t have very many pictures for almost a year!!! I think I took a bit of a hiatus from this project while I figured out what I wanted to do next with it, and also sidetracked on other projects. One of which was researching and starting the buying process of a CJ750 sidecar motorcycle.
I also wanted to do some sheetmetal bodywork on the trike to hide all of the wiring, and other miscellaneous crap. I have done very little sheetmetal body work, so I did a lot of research to learn about it. I was also working on figuring out a better way to make the manual kick starter.
2-1-2013
Here’s a few pics of me making a dished area on a chunk of HDPE to make a tuk puck for shrinking sheetmetal.

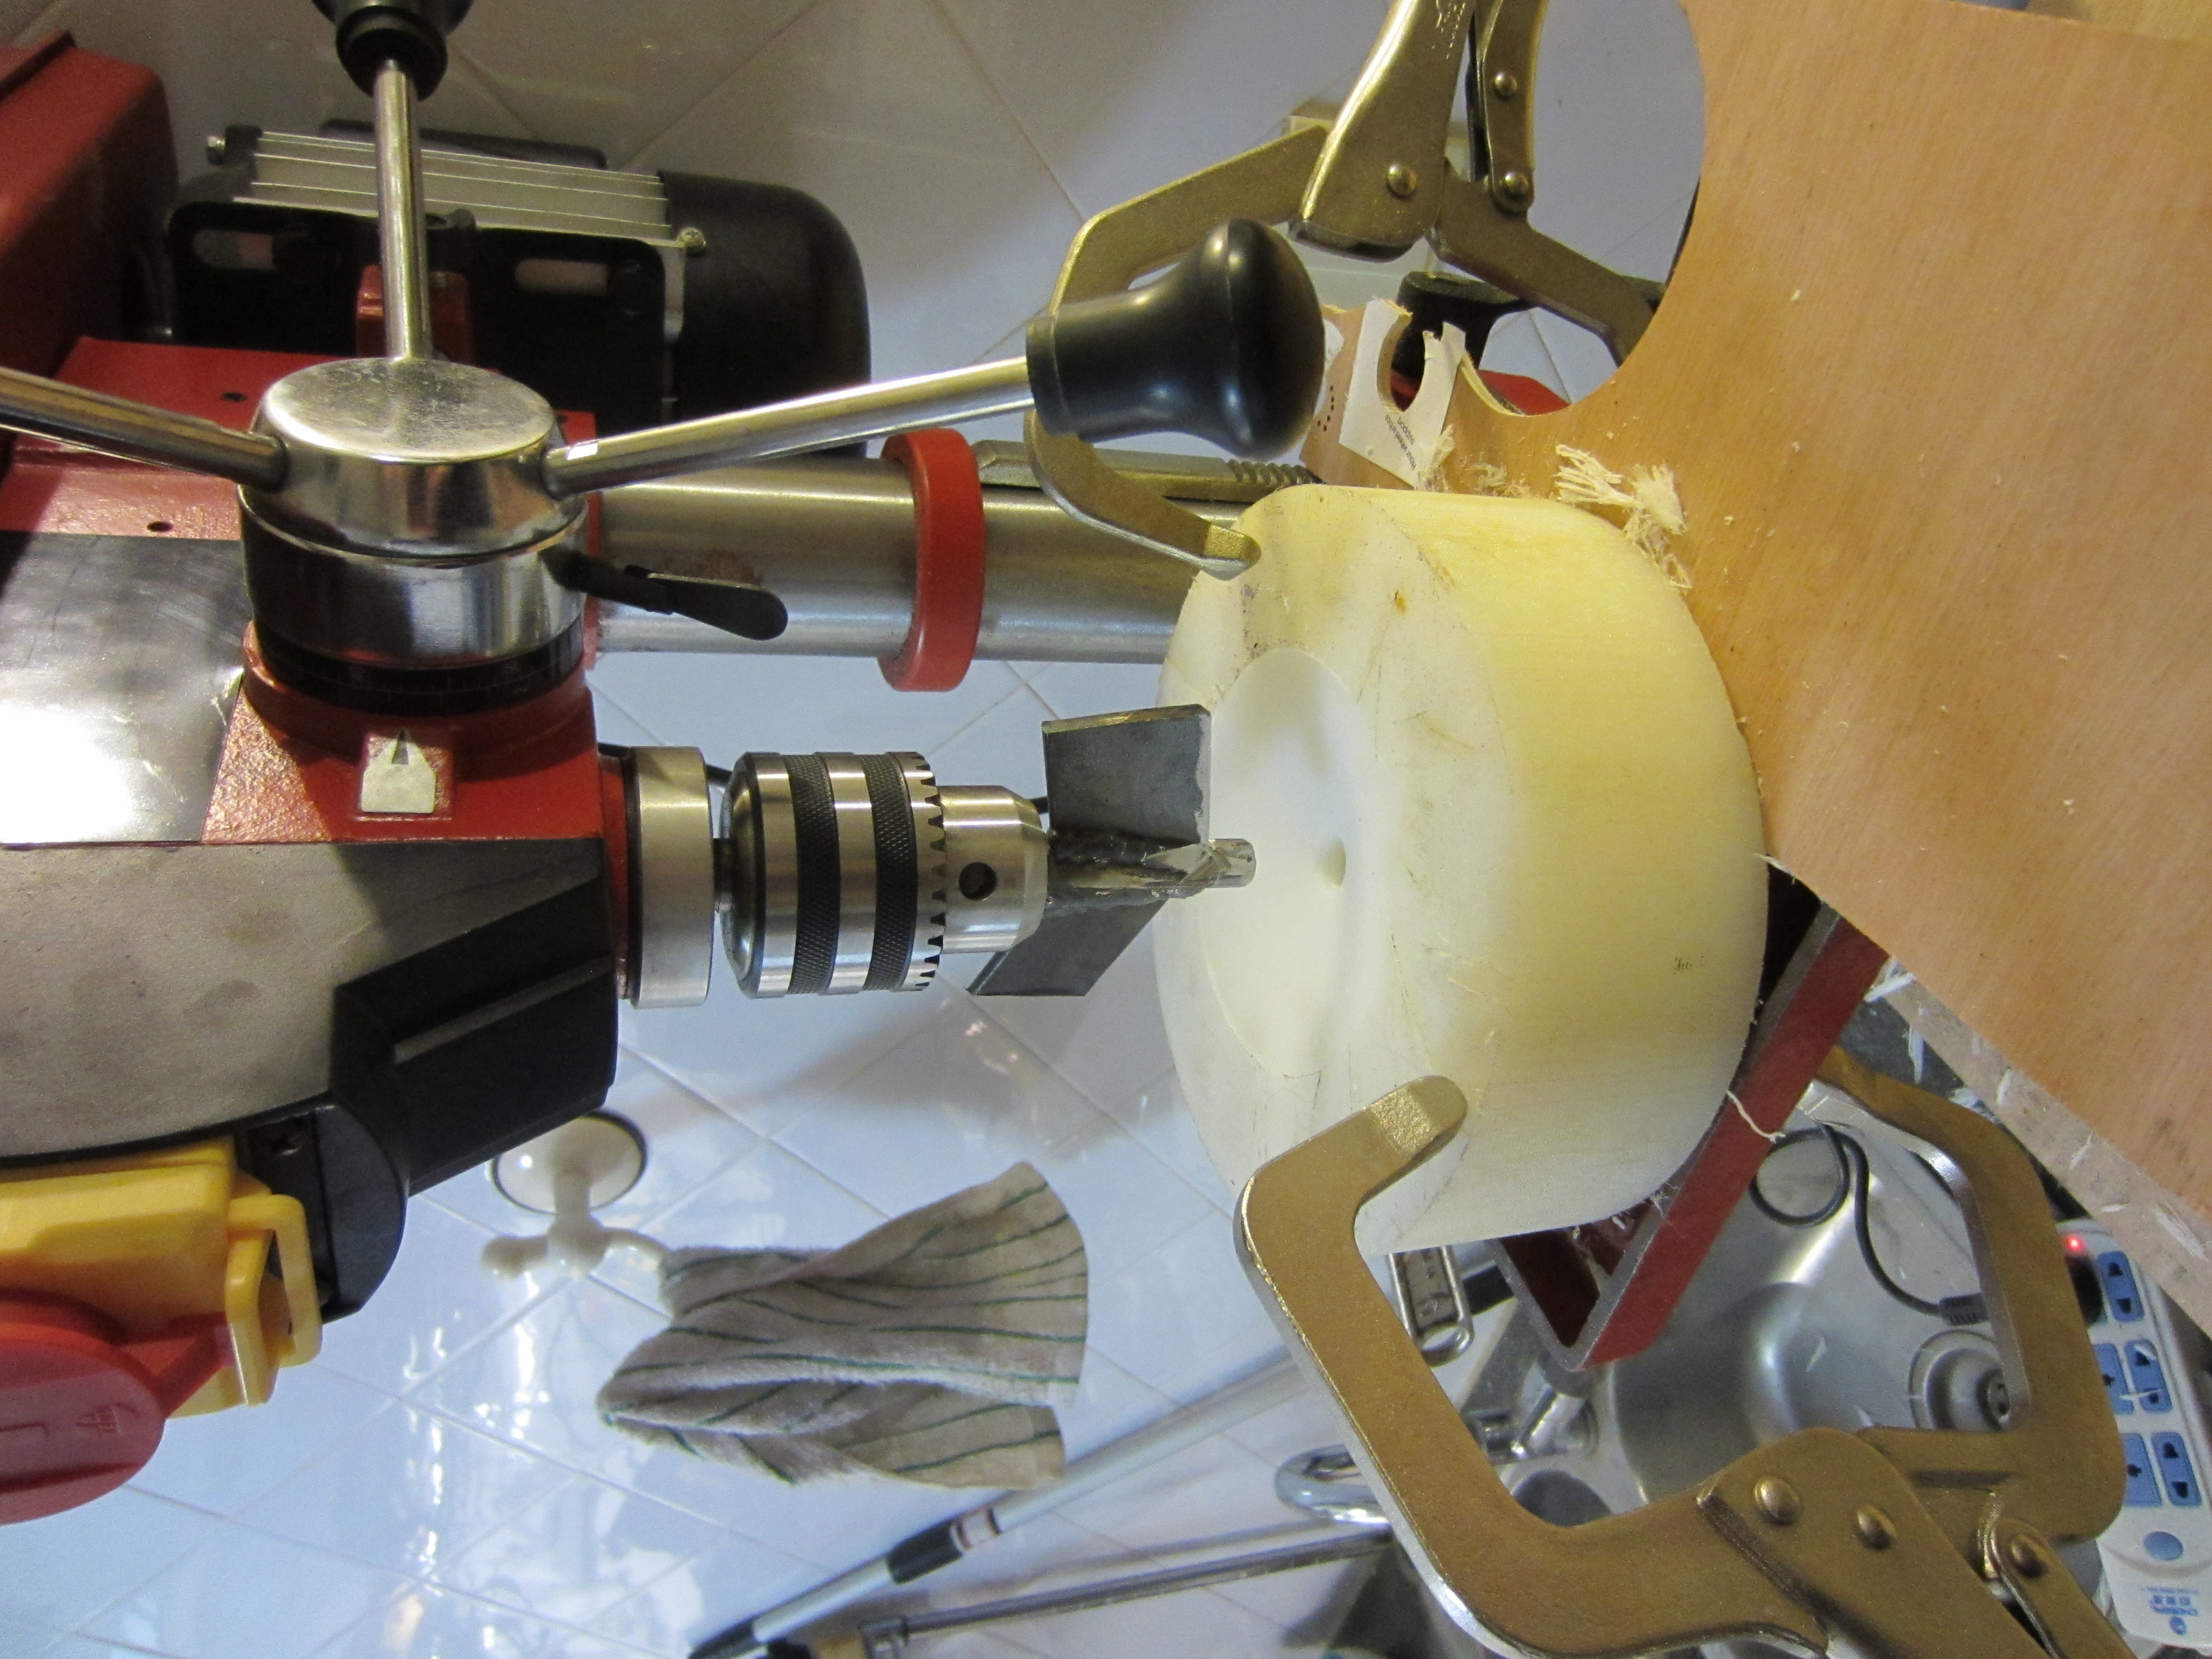
My homemade fly cutter made a tremendous amount of noise and chatter when it cut this dish, but it got done! This would have been so easy on a lathe, but I didn’t have one available. The results aren’t particularly pretty or even, but it does work for shrinking sheetmetal!
I also bought a thin piece of galvanized sheetmetal for the bodywork, and I also bought a nice electric sheetmetal nibbler shears (handheld) in China down at the tool market. It wasn’t cheap, but for a Chinese branded power tool, it actually works really well!

I did a lot of reading on the allmetalshaping.com forum for learning the basics of making the metal move. There’s some very knowledgeable guys over there, and its definitely worth the time to read through the basics before posting. They have some really cool pictures of work the guys have done…. a really good time waster while you learn!
3-3-2013
Back to the trike, I finally have some action shots and some video of it in motion! I got the electric starter problem figured out, combination of a weak battery, and a stuck solenoid!


3-16-13
My research of projects over at the allmetalshaping forum showed that a good start to figuring out the initial panel size for a piece of formed sheetmetal was to make a flexible shape pattern out of blue painters tape. It takes a lot of tape, but then you can peel it off as one big panel, and carefully flatten it some, and then trace the cutout on the sheetmetal.
There’s some decent information HERE, so I won’t go into lengthy detail right now.


I neglected to take any pictures while cutting and forming the sheetmetal for this side, but boy was it loud in my little garage! I probably didn’t make any friends with the neighbors that day, but at least I got the panel made!


Because of all the noise I made, I ended up taking a long break before making the other side…. yup.. 11 months!!!
But I did have one good excuse… we ordered and received the Chang Jiang CJ750 Sidecar motorcyle, which showed up …. 7-28-13….
I’ve got that all written up on purchasing it, and the break-in adventures we had with it.
2-1-14
Finally getting back to work on the trike, and I had a week off from work for Chinese New Year! Lots of really loud fireworks, so the neighbors shouldn’t mind my pounding too much! The Chinese know how to make some really loud firecrackers, way louder and more explosive than anything available in the US to the common lay person!
So here’s some pics of the other side:


Then on February 27, 2014, Onnika Christine showed up!!! So now we comprise a family of 3, and I’ll be training in a little tool monkey, just like dad did so many years ago with me!!! Fatherhood is great!

Sometime in March/April 2014
I didn’t take pictures to document, so now I don’t have a good record of it, but I worked out a pretty cool manual kickstarter for the trike. The original kick start lever didn’t work very well as the motor was inside the frame, and interfered with its operation. I wanted to get it outside of the frame, and have it be quite robust so it would actually work when needed. I found that out the hard way when trying to get it started when the electric start wasn’t working!
In the process of making and testing the kick starter mechanism, I put so much force on the engine that I ended up breaking the really light cross member tubes!!! Remember much earlier I stated that the tubes were really light, and it would bit me in the butt? Well, it did. I ended up buying new tubing, larger size and thickness, dropping the motor out, replacing the tubing, and then reassembling it all. I was not very happy having to redo all of that work, but the results were worth it!
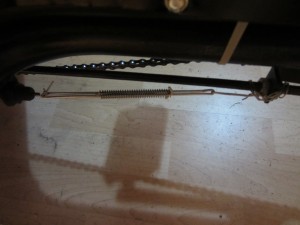
So what did I do to make this kickstart? I welded a sprocket in place of the original arm, using the cut off splined portion so it is still removable, and then used the main pedal bearing assembly from the parts bicycle as a jackshaft, with one end the arm with a pedal on it, and the other end with another sprocket welded onto it. Then I threaded some motorcycle chain around it, fastening one end onto the pedal jackshaft, and the other end is attached to springs that attach to the very back of the trike with a turnbuckle for adjustment.
So when you kick the pedal down, it rotates the shaft, turning the sprocket, which pulls the chain, which then pulls the other sprocket and rotates the motor over. It stretches out the springs, which then serve to retract the chain when you lift your foot back up. This allows you to rapidly spin the motor over and get it started.
A bit of a spoiler alert, but these are the only pics I have of it, which are after full disassembly, paint and reassembly:


5-1-2014
Back at it again, finishing up the side panel, and adding in the panels around the gauge cluster and forward wiring.


Paper patterns for making the gauge cluster surround.

Now to start cutting sheetmetal. Here’s a picture of my electric shears that I bought in China, and it actually works quite well!
Using a hole saw to drill the clearance hole for the ignition switch.


Here’s a nibbler attachment I bought for my drill… I always was pretty doubtful of the capabilities of this until I bought it and tried it. It’s like a hot knife through butter on the thin sheet metal that I’m using! It cuts quite well, but the little shavings are tiny half moon pieces that are razor sharp, and there are a lot of them, so be careful!


Here you can see how I shrunk the area around the gauge cluster:


Here’s a shot of my little helper and quality control supervisor!
 Almost 3 months old!
Video of the test drive with the body work on it!
5-18-14
The main drive chain had been running loose for quite some time, and I had made a really crude tensioner that kept it from rubbing on the angle cross member. I didn’t like it, and so I removed it, notched out the angle so it couldn’t hit, and then used a half link on the chain to tighten it up, and then made a nice little wear bar out of some HDPE plastic I had gotten awhile ago. That keep the chain from rubbing on the square tube cross member, and makes it much quieter! Here’s how it looks:


Then I added the plastic pieces from the scooter onto the sheetmetal seat pan to see how that all worked and looked together! I like it!


6-1-2014
Time for a full teardown, finish welding, and then paint!


Lots of parts:


More welding:


Kick starter mount:

6-2-14 Painting the main trike frame:


You might wonder why the tops of a few of the paint cans have been cut off…. Well, here’s why: There’s crappy spray paint that you can get a Wal-mart, but then there’s crappy spray paint you can get at a hardware store in China, and then you realize how good that Wal-mart paint actually is!!!! This spray paint was THE WORST PAINT I’ve ever used!!! I bought 6 cans of black paint, because that’s all that he had, and I figured it would take a lot….. The first can went ok, but it didn’t cover much. The second can sprayed for literally 2 secs, and then just stopped! I figured that maybe the cap plugged, so I switch caps. Nope, that wasn’t the solution either. It somehow plugged farther down. Well, I wasn’t going to waste the whole can, so out came a screwdriver, and I “carefully” made a hole in the top edge…. well, more like I banged at hole in it, paint sprayed out everywhere and I frantically waved it around on the trike frame!!!!! What a mess, paint all over my screwdriver, my hands and some of it even made it on the trike! After the pressure released, I took the tin snips and cut the top of, then used the paint brush to brush on the remainder. I wasn’t very happy, and even less so when it happened on a second can of paint!!! Yup, I was cussing China quality at that point, because how difficult is it to make a decent can of paint??? The irritating thing is that each can cost 10 rmb, about $1.50 each, so it wasn’t even like it was the cheapest paint I’ve ever bought. After using the rest of them up, and still a lot of parts to go, I needed to go buy some more paint. This crap had the brand name “S” for Saixishi, so I knew not to buy that stuff again! I went to a different hardware store, and they had some paint with the brand name “SANO”, smaller can, but felt heavier! I bought 4 cans of it, same price as the other store, 10rmb each. It sprayed on beautifully!!!! 1 can of SANO paint covered more surface area than all 6 of the other brand of paint!!!! 2 cans of that covered all of the remaining sheetmetal parts, which had way more surface area than the frame did! So while you might be cussing all that cheap crap that comes from China, you have no idea how much worse it can be for a product that is sold ONLY in China!!!!!
Frame painted with the crappy paint:

More parts that need to be painted:


A few more parts that got painted with the crappy Saixishi paint.
The much better SANO paint covering some parts the following weekend, 6-7-14:


Now to do the reassembly…
6-13-2014
Before reassembly, I needed to clean-up the motor as that would be one of the first items back into it:


One of the original motor studs was pretty worn out, so I made a new one out of some ready rod. Then it was time to use the jack and slide it under the trike and then up into position:


Then I re-installed the motorcycle chain, but used a half-link to shorten the chain a little bit. After I got it connected, I used a ratchet strap to pull the axle back to tighten it all up.


Then installing more bits and pieces until it was time to re-install the wiring harness.


6-21-2014
More bits and pieces,


Getting pretty close to being done, but now a break while we head to the US for 3 weeks… June 26 through July 22…
8-23-2014
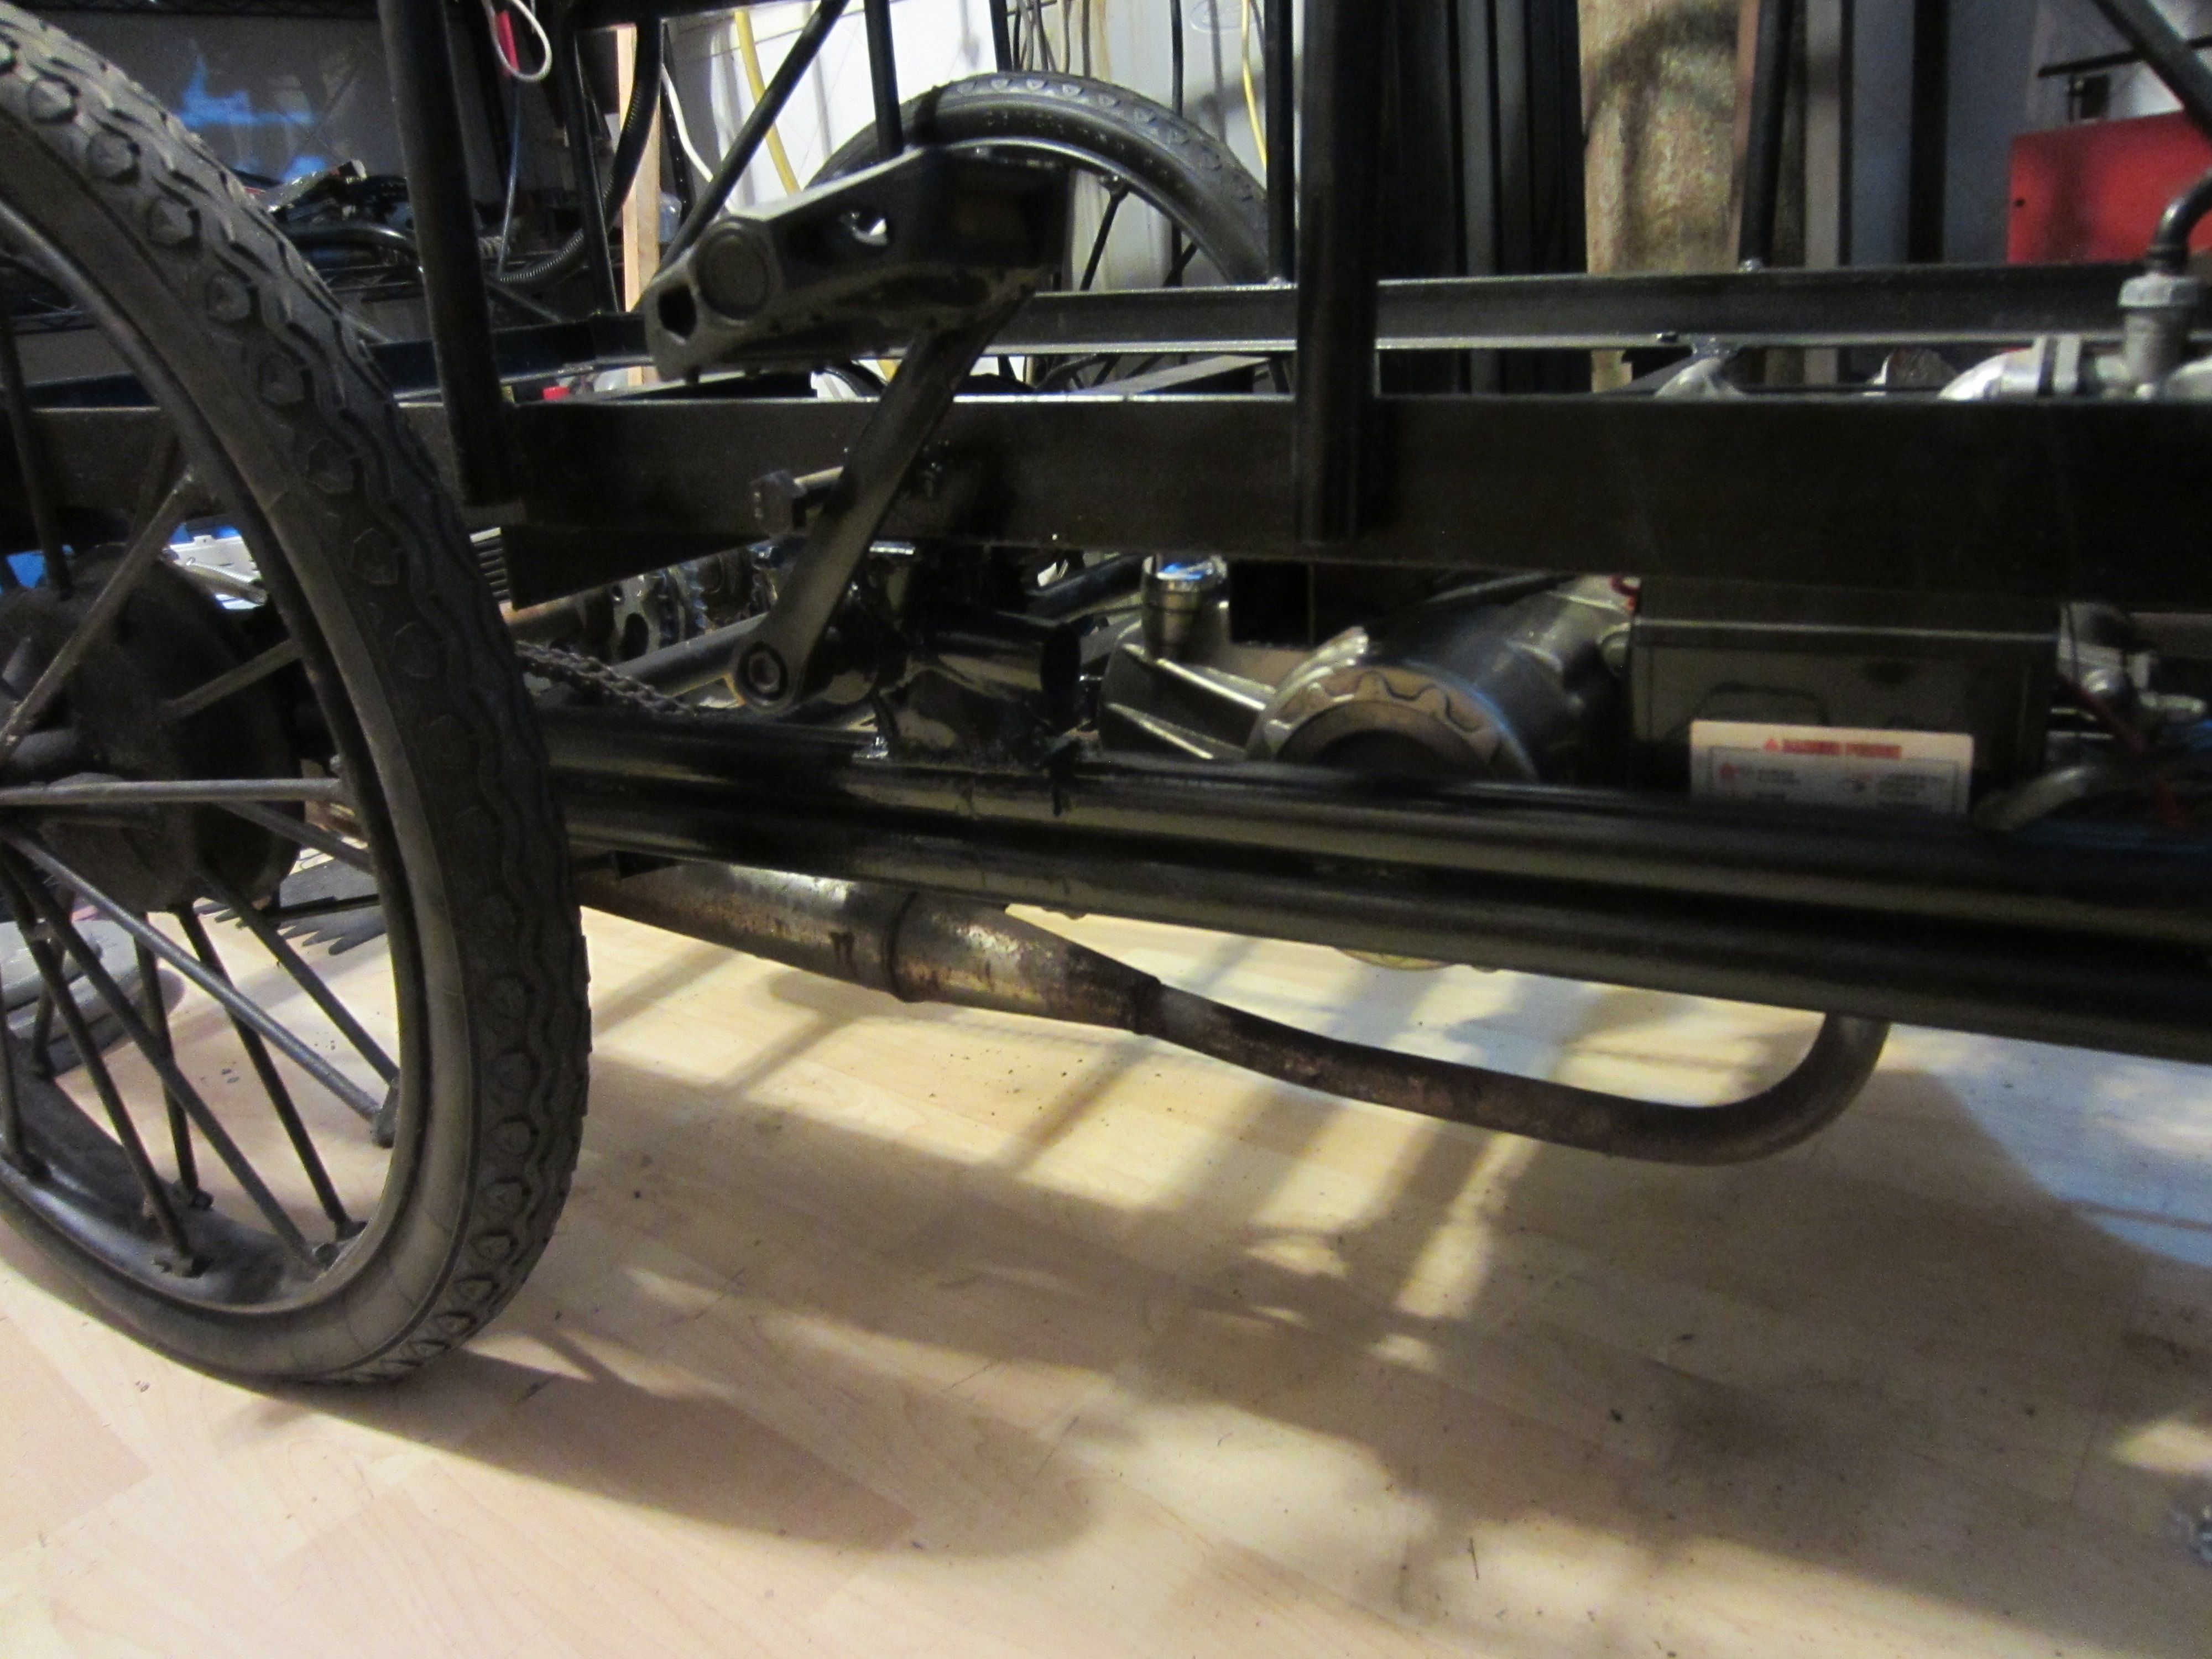
Back in China after being in South Dakota, now its time to get this thing finished up! Before I put in the plywood for the floor in the bed, here’s some detail shots of the mechanical’s:


As you can see, the carburetor and air cleaner and a bit of the starter protrude above the level of the bed, so I’ll have to cut the plywood to miss those items.
The battery is also nestled down below the level of the bed, and I want to have access to the battery terminals for charging or replacement if necessary, but still be secure from theft. If its not nailed down in China, it can and WILL get stolen!


Then I added a hasp so that a padlock can be put on for security.

I needed a light extension spring to connect the brake switch to the brake actuating rods, but doggone if I could find a light one in China. The only ones I could find were short and beefy, rather than long and light like I needed. When I was back in the US for the summer home visit, I specially went to a hardware store, where these springs are easily found and bought a pair of them for $5. I’m fairly certain they got packed in the suitcase, but when we got back to China, doggone if I can find them!!!! So I had to improvise, and using some compression spring stock that I had, I made my own extension spring, here’s the results:


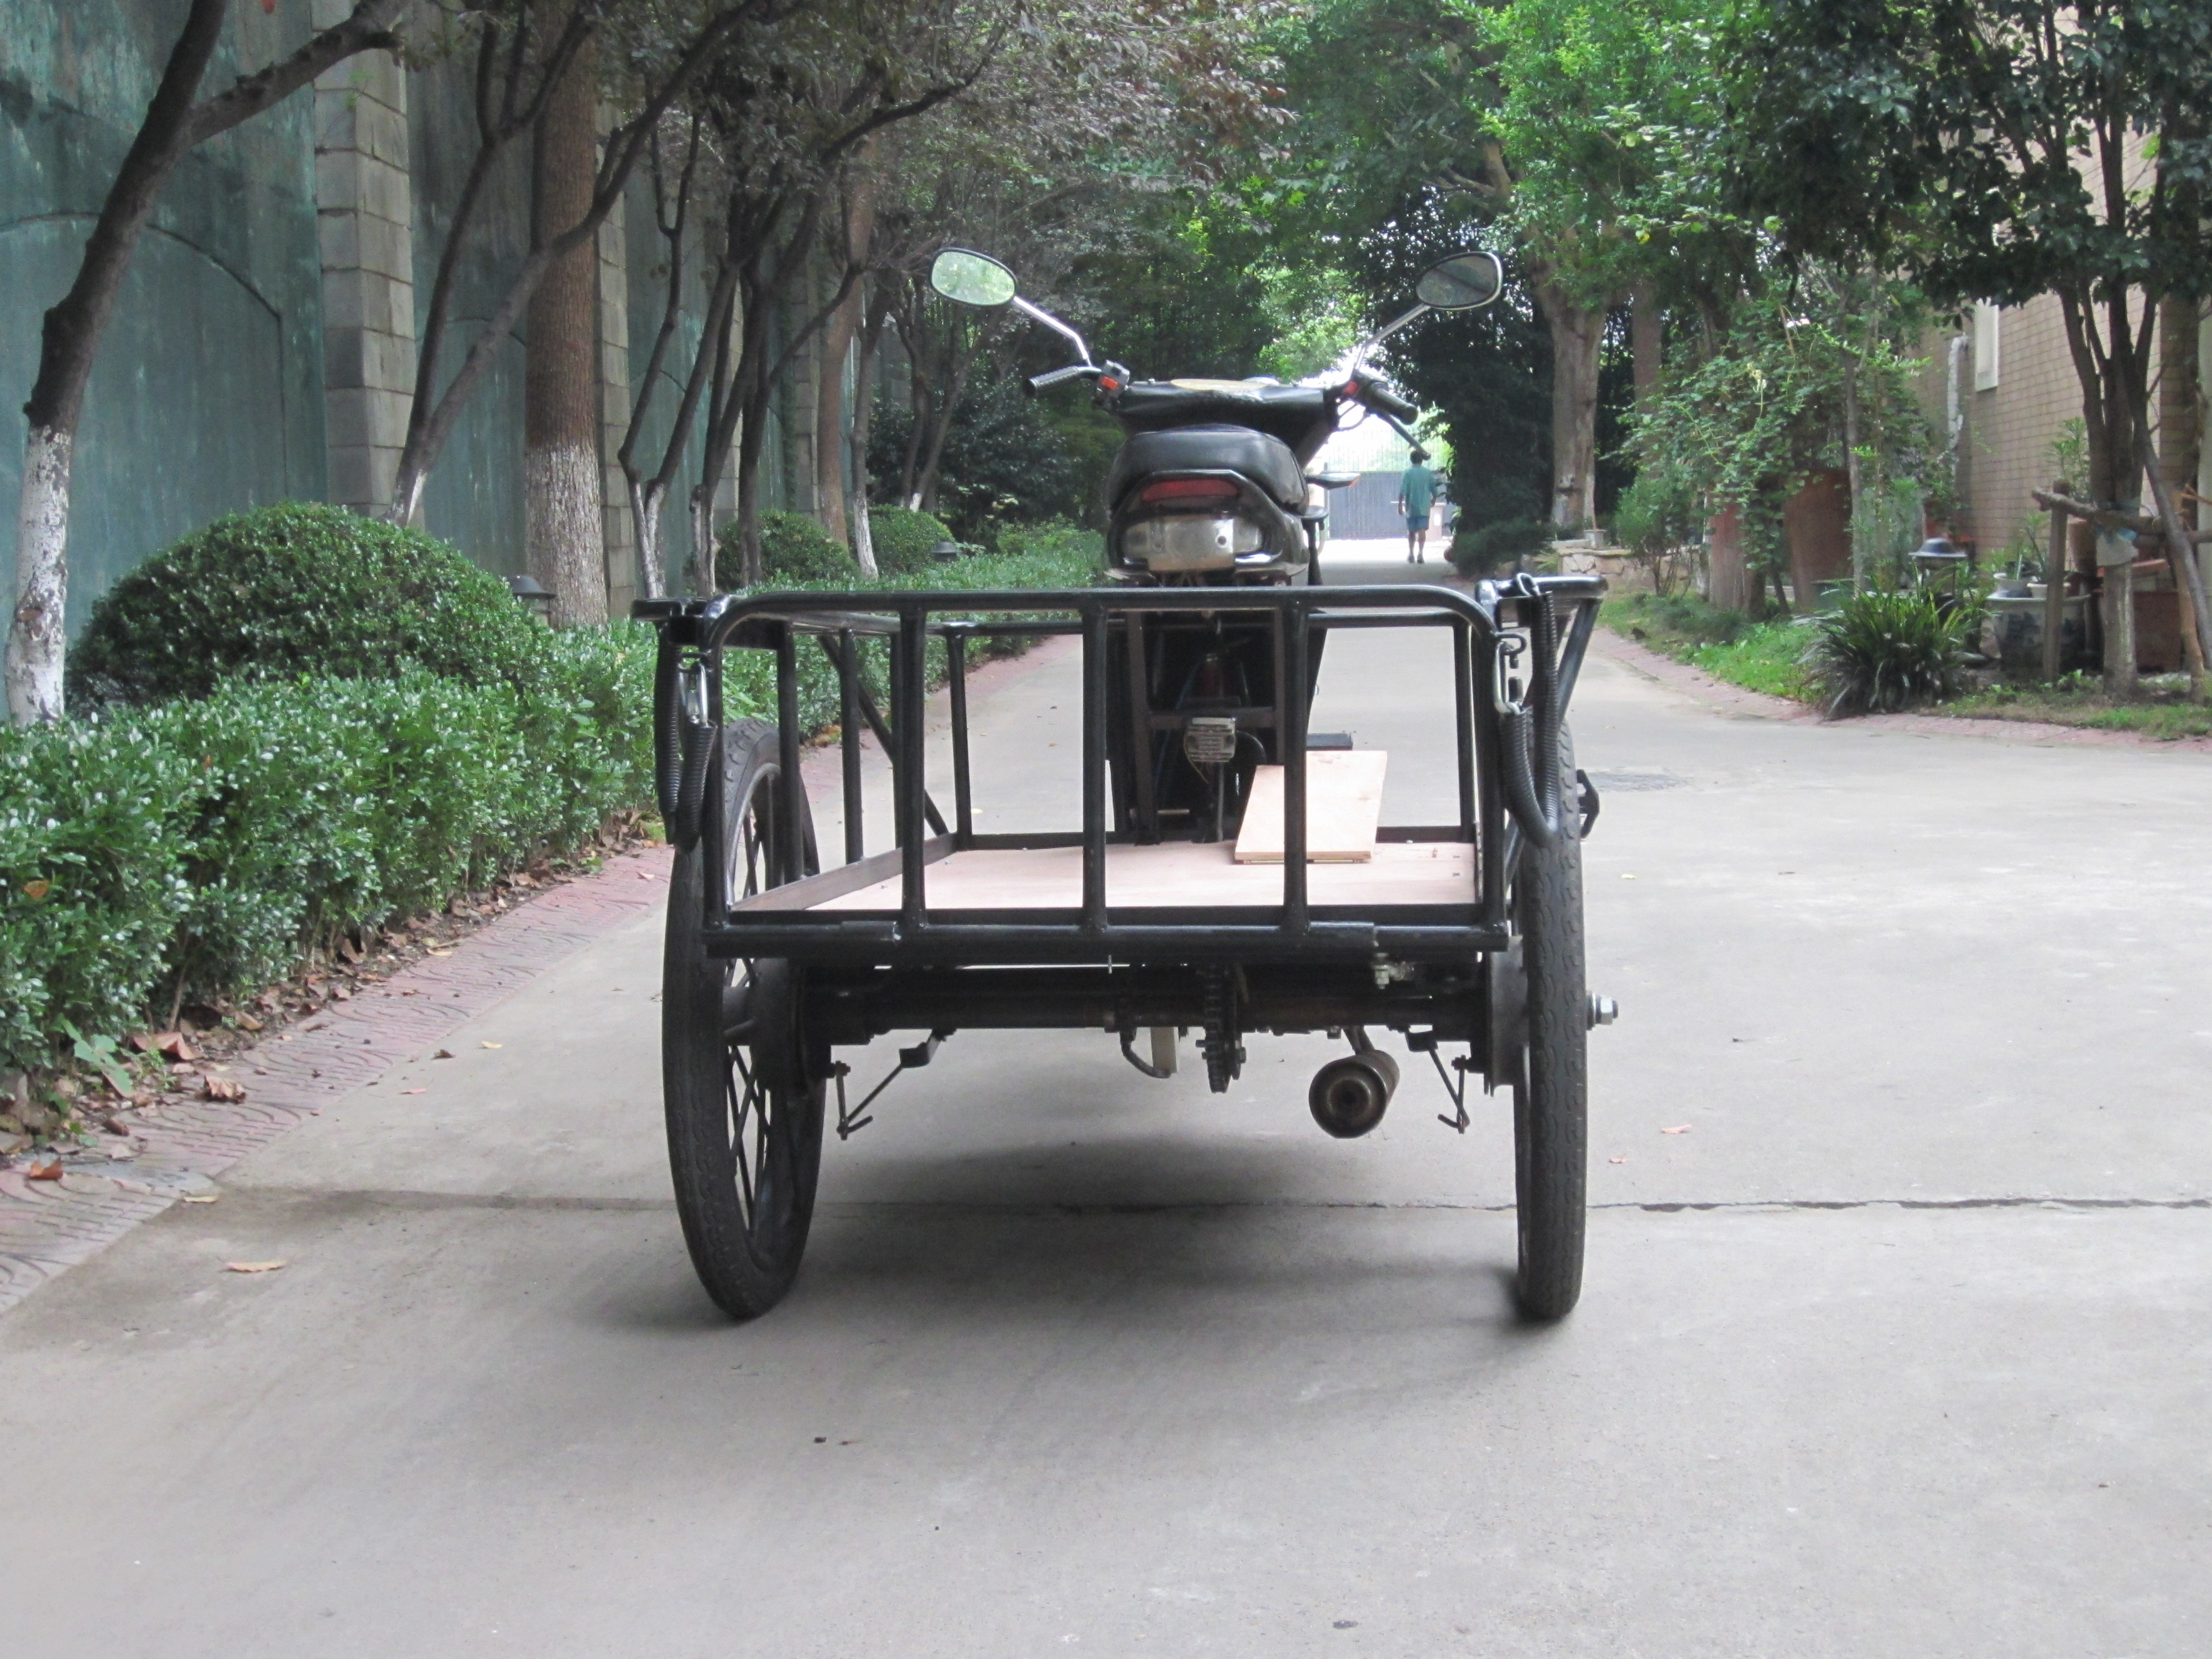
So with that done, I could finally call the trike DONE!!!
Here’s the glamour shots!


Next up, some videos of the finished trike.
Updated 10-27-14
